This post is a long time coming since it has to do with a custom gown that I created in 2020 for a Spring 2021 bride. As we all know, 2020 and 2021 were difficult, turbulent, stressful, and unfathomable for everyone. But when it came to couples who were hoping to get married during those years, it was a never ending nightmare!
I actually had three brides/custom gowns I was working on in 2020. Two of those brides I've been able to post about since somehow, someway, they were able to sneak their weddings in during that year. It took lots of modifications, sacrifice, planning and re-planning, but they did it!
My third bride and her fiance' had their hearts set on a 2021 spring wedding in Telluride. And unfortunately, they just couldn't have the wedding of their dreams even by March of 2021. There were so many restrictions still in place, that they decided to postpone for another full year so that they could host the celebration with family and friends that they really wanted to have.
Andie had already tried on a gown that she really liked, but came to me to see if I could create something similar, but with a few custom features. And that, as they say is how it all began.......
Fit was essential since this was a fit and flare off-the-shoulder style gown with a super long train. I took every conceivable measurement and then went to work creating the actual pattern pieces. As always a simple muslin was created to check the fit, before I cut into the fashion fabric. Critical to the fit were two of the custom design features. 1) the flare had to be enough to allow her to ski board into the ceremony. Yup! You read that right...both she and the groom would be making a grand entrance to the ceremony site and their waiting guests. 2) while she loved the off-the-shoulder design, she was hoping that I could create something that would allow her more flexibility/freedom than the typical off-the-shoulder allows. This was not only based upon the "ski-in" requirement, but she expected to fully party at the reception and wanted more "range of motion" than she was getting. The third requirement, while not fit related was also critical to her arrival.....I had to find a way that she could hold/carry and/or bustle the train.
The fit worked out beautifully. My pattern pieces were very oddly shaped, but that was critical to get the bodice to hug her gorgeous figure. And yet, below the knee it flared to the extent that she needed. As for the "shoulder straps"....I gave them a bit more drape so that she could slip her arms out of the straps completely. I then had some hidden hook and eye fasteners on the back of the gown which allowed them to stay in place (almost like a bustle for the train).
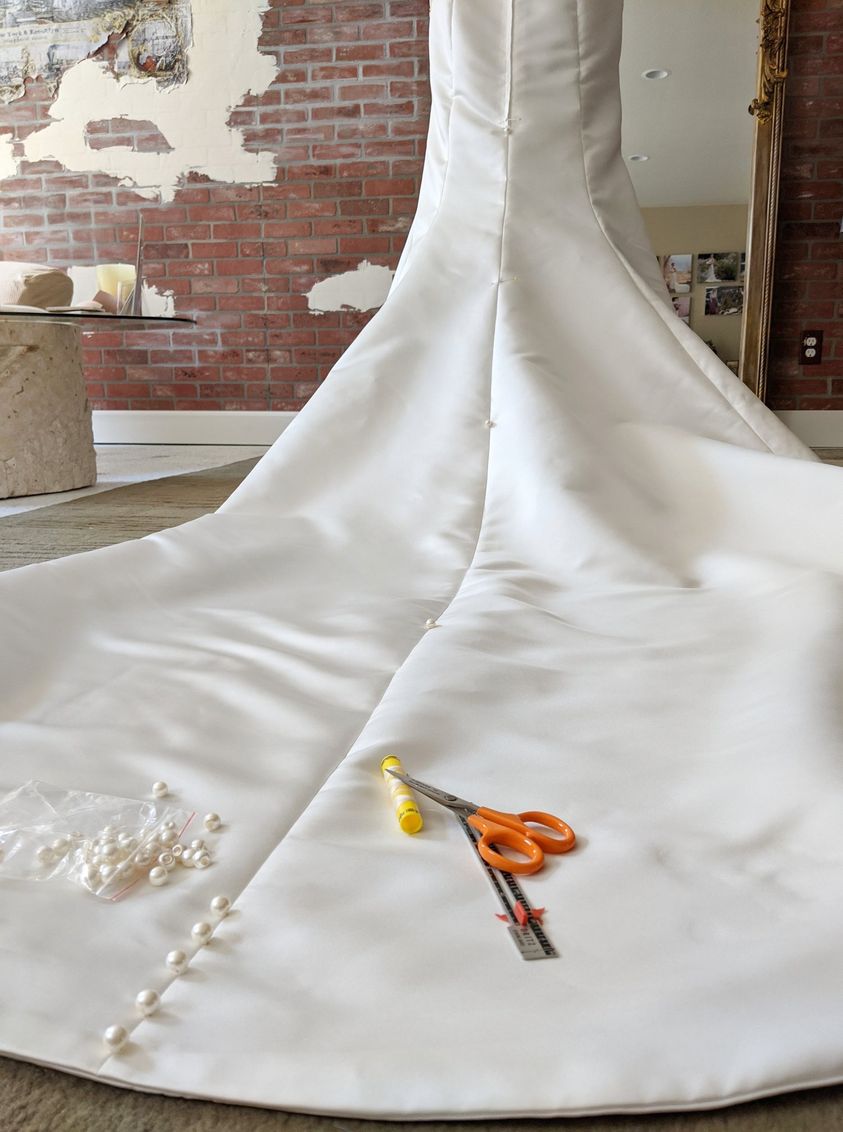
Finally, I made a long strap and attached it on the underside of the train which would allow her to hold up the train while she was boarding. And for the reception, I created a pretty bustle. In case, you're wondering, there are 100 pearl buttons hand sewn down the back of the gown.
I'm so thrilled to have received some professional pictures from the big day so that you can see how beautiful Andie looked on her special day. Unfortunately, I don't always get pictures from the actual day, so I've learned to take a lot of pictures along the way.
I'm so honored to have created Andie's gown.....she was an absolute peach to work with. My very best wishes go out to the newlyweds. May you enjoy a long, happy and healthy marriage!