Search This Blog

Pages

Thursday, March 29, 2012

LAPEL PINS

I love lapel pins!  Whenever I wear a suit, I wear a lapel pin.   I have several enamel; gold/silver that go with just about anything.   I wanted something with more color and splash.  Maybe I have a case of spring fever, since the daffodil, crocus and hyacinth are in bloom, and the tulips won't be far behind.   

With that in mind, here are my spring inspired lapel pins.    The sky is the limit with these since they are made with scrapbook paper and as you know there are aisles of these papers at your local craft store.  Here are just a few ideas, along with the instructions and supplies that you will need..........


The first thing you need to do is find some papers that melt your butter.......


............ to that, add some gold rings (jewelry aisle), pins and brush on gloss. Anything else is up to your creativity and imagination!  If you look closely you will see that I add some lace to the edge of one and some silk flowers to another. 


To start, cut your paper approximately 2" x 8"....again, this will be your preference in terms of the size you prefer.  Once the paper is cut then accordion fold it in approximately 1/4" increments.
After you've folded the paper, pinch together one end to form the fan shape and hot glue between the folds.  If you want to add the gold loop to the bottom; spread the loop apart.  Then with a large needle (I mean a big honker....like an upholstery needle) make a hole on each side and secure the loop into the holes.

As an alternative to the loop, I chose to glue a very small buttons to each side (see below) 
After you have finished that step; brush on the gloss ... it dries quickly and has a very high gloss, which is what I wanted.   Finally, add a pin to the back of the fan and any embellishments; tassels, flowers, lace...you could also add some beads...or glitter..


Now that's what I call accessorizing!


Friday, March 23, 2012

PICTURE FRAME

I am just now putting the finishing touches on our guest bedroom.   My re-decorating project included fresh paint on the walls (thank you dear), new curtains/rod, throw pillows, bed frame and some accent pieces.  I figure the overhaul cost approximately $200.  Not bad for a whole new look and a beautiful queen size bed (hand-me-down since we upgraded to a King) for our guests.

I wanted to add a little something to one of the walls and tie in the purple color theme into the piece.   The room also has black, white and deep green accent colors.  The frame below is what I ended up with.  
 I started by making several rolled flowers.  I used patterned ribbon for two of them and for the third, I used a solid orchid fabric that is a great match to the bedspread.

The next item I made was a chiffon flower.  I used three different fabrics to make the petals: a white chiffon with black embroidery, the orchid fabric (rolled flower) and some black chiffon.  You can find many good tutorials online for making both types of flowers, so I won't bore you with that.


The next step was to cover a frame (that was in a box in the basement).  I glued 3/4" ribbon to the perimeter of the frame.
I used spray adhesive and applied the orchid fabric to the cardboard frame backing.

Then I gathered up some twigs from the backyard and spray painted them black.


After playing around with the placement of the branches and flowers, I secured them into place with my glue gun.  Because I craft so much, I have a vase filled with leftover stems from previous projects, so the white and purple flowers you see are part of that collection.

It looks to me to have a bit an oriental flare (maybe because the branches and flower sprigs look similar to a cherry blossom tree); which ties in nicely to the three canvas prints and silk orchid plant that are a part of the decor.  It was fun putting it together....and again, the best part was I didn't purchase a single thing for this project!     Have any old frames that need a makeover?

Tuesday, March 20, 2012

LUMINARIES

Take some small mason jars, a potpourri of craft items and a little creativity and make yourself some luminaries..................................

 We will be using these on the deck area/bistro tables at our daughter's wedding reception.  I made a total of five unique luminaries, carrying the fall theme and beautiful sage green accent color throughout.   Those of you who have read previous posts will recognize the pine cones, moss (birch planter), heart entwined charms (votives), silver/gold accents (ornaments).  You are also seeing a preview of the paper/fall leaves that I used for the wedding invitations.    I also rummaged through all my sewing/craft bins and pulled out several other items. 

 
 So what did I purchase for this project?
  •   patterned vellum paper (two types)
  •  scrap book paper (one wedding variety)
  •  LED luminary lights
 When using vellum paper (far right and far left in the picture below) use Mod Podge on the glass and then once you've pressed the paper to the jar, generously spread Mod Podge on the paper itself.  Don't be afraid to use your hands...in fact, it helps to remove any air bubbles and provides a
smoother adhesion to the jar.


Take a doily and use spray adhesive to glue it to the jar.  Add some raffia ribbon at the neck of the jar and tie wheat and fall sprigs in place.


 This jar is a paper and Mod Podge wrapping.  I then hot glued moss and pine cones to the neck of the jar.  Wrap ribbon around some twigs; add an embellishment, like this charm (wedding aisle at JoAnn's) and glue it to the moss.


For this one, I used Mod Podge and dusted some fine glitter over the top of the glue.  I then cut a piece of the wedding paper (scrap book aisle of Hobby Lobby) and burned the edges with a lighter and glued it in place.  Add some raffia ribbon, gold cord and silk leaves for finishing touches.


................and more ideas with ribbon, lace and a brooch.........

Don't they look great illuminated?
                                                 
  .....or throw some baby's breath or other delicate flowers in them with some water 
and use them as a vase. 

No wedding in your future?  That's okay....make some for yourself to enjoy this summer on your patio, or make one or two for a friend for a birthday or house warming gift. Once the ideas start flowing, there will be no stopping you!   Have fun creating your own.

Friday, March 16, 2012

WINE RACK

Just had to share a "his" project with you.   Check out this wine rack that my husband made!  Isn't it cool?


The rack is made with four deer antlers; one large, three small.   You could purchase "sheds" on-line or possibly have some luck finding some yourself while hiking, or they could be the result of a successful Texas deer hunt like my husband recently had.   We have enough venison to last us for many months to come.   Yum....

Anyway, the trickiest part of this project was playing around with the antlers to create just the right angles and support to hold the wine bottle.  Once that was determined, he had to apply glue (tip:  after trying several types which didn't work, gorilla glue did the trick) to the two key touch points.  This provided a temporary bond to allow him to screw into the antlers from the underside; this rack has a total of six screws providing a permanent hold.   Be forewarned...using a drill on antlers creates a really foul odor....best, to ask for a bit of advanced warning so you can steer clear of the garage during this step!

The final step (this was my contribution) was to mix up some paint to match the hue of the antlers and paint over the screws so they were camouflaged.   (special note from the designer:  he would normally "counter sink" the screws and use a wax pencil to cover the screw; however, because the circumference of the antler was relatively small, he chose not to use that approach)

I think this little project earned a prime spot on the fireplace mantle!

Wednesday, March 14, 2012

BIRCH PLANTER

As you read from my previous post,  my husband and I were working with birch bark sheets we had purchased to build the wedding cake platter.   Since I had some "leftovers", I decided to make a little something for my daughter and her fiance' just for fun.  What's even better....I didn't purchase a single thing for this project; I actually had everything on hand from assorted projects I had already made.

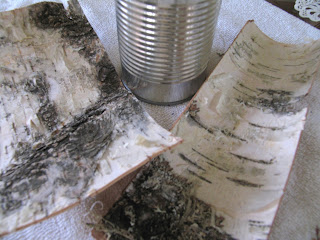
 In addition to the leftover bark scraps, I used an empty tin can that was headed for the recycling bin.  I pulled off the label and washed out the can and promptly got to work gluing the bark around the perimeter of the can. 
Once that was finished and the seams were painted (see the post on the cake platter for the technique used), I drew the heart and initials onto the can with a pencil and carved the initials into the bark using an exacto knife.

After that I stuffed the can with styrofoam I had on hand, I glued some moss/greenery to the styrofoam and also added a bit of moss to the bottom edge of the can.    Then, it was a matter of adding some flower and twig leftovers (press them firmly into the styrofoam and hot glue as needed to hold everything securely into place).   That's all there was to it.

 I gave it to my daughter last night and she absolutely loved it!   She plans to put it in on the desk in her new office.   That does my heart good............:)

Saturday, March 10, 2012

CAKE PLATTER

The quaking Aspen tree is one of the unique features of the Rocky Mountain landscape.  Its white bark and delicate leaves are a beautiful contrast to the deep green evergreens and pines you will find living right alongside a huge Aspen grove.

A popular wedding cake platter found today is the tree trunk cake base; both my daughter and I love the look of it but again wanted a Colorado touch.  Soooooo, I looked high and low to find an Aspen wedding cake base, to no avail.  However,  I could find birch.....which is a cousin of the Aspen, sharing the same white bark and dark brown markings.  Eureka!

Not so fast......the baker I found who will be making the cake (chocolate with raspberry filling and buttercream frosting-Yum!), requested a 16" base so that we would have a 2"  border all around the base of the bottom tier.  Now consider, a 16" base is an extremely large tree!  The vendors you will find on-line selling bases generally use already fallen trees; most offer 10-12" bases. 

Onto the next DIY.........................

Step One -
Purchase two pieces of 8x10 inch birch bark from www.save-on-crafts.com
 
Step Two-
Purchase 16" round plywood disks at Lowe's; based upon the height we wanted, we purchased four.  Those were glued together one on top of the other by the trusty husband, using the trusty Elmer's wood glue.  One side was sanded and varnished for a beautiful finish (obviously, this would become the top).


Step Three-
When we received the bark, it had dried with a natural curl opposite of how it would grow on the tree; in other words, it was curling in on itself.  In order for us to glue the pieces to the disks, we needed to reverse the curl.   We soaked the bark in a bucket of water overnight to make them more pliable.  When removed from the water, they were trimmed slightly larger than finished width of the base and clamped to the inside of a bucket; the right side facing the bucket. The intent was for the dried pieces to have the more natural curve for easier adhering.   Clever huh?  ..... by-the-way, it worked well!


Step Four -
Use the glue gun and begin adhering the bark to the base; pressing firmly as you continue all the way around the base.


Step Five -
What to do about the seams?  This step reminded me of the taping a professional drywaller uses to cover the seams of the dry wall pieces prior to painting/texturing the wall. What I chose to use was white paper, Mod Podge and some paint (I have lots of craft paint on hand, so I used off white, grey, dark brown, along with some blended variation of those colors).   The paper I used was a more natural paper; meaning it had fibers running through it (I found it in the scrap book papers at Hobby Lobby).  I tore the pieces to make a ragged edge and purposely made the strip uneven to make it more natural when I glued it down with the Mod Podge.  Then I used the paints and a small paint brush and painted over the paper to blend with the bark itself.  It looks great, if I do say so myself. 


 So there you have it.... a 16" birch base cake platter.  I can't wait to see it with the beautiful wedding cake on top of it!


Tuesday, March 6, 2012

TABLE NUMBERS

Each of the tables for our daughter's wedding will include a centerpiece, three candles, pine cones and preserved fall leaves.  With that in mind, I wanted the table numbers to be easily seen by the guests, yet I felt what we had already created would be just the right mix.  So, I didn't want to complicate or add to the table top itself.   What to do....what to do.......

 Why not display them from the existing centerpieces?    This DIY was definitely an "ours" project, since my husband was a big help!

 Here is the finished project.  I'll step you through it below:


I purchased strips of balsa wood (approximately 1/16" wide) at Hobby Lobby and made a leaf pattern out of paper.  I chose balsa since I wanted something stronger than a paper, yet light enough to hang delicately from the centerpiece itself.

My husband used an exacto knife and cut out the leaves for me.  It was a delicate process, since too much pressure would split the wood as it was cut.

A couple of other tips he would offer, is to consider that the more intricate the leaf, the more cuts it obviously takes (his grip was definitely fatigued), so you may want to consider something a little less ambitious than my design, especially if there are a large number of tables.


 After they were cut, I mounted a a jewelry fastener to the back using my trusty glue gun.


I was tempted to leave them natural and just spray a bit of semi-gloss lacquer on them, since the natural wood was definitely appealing.  However, I wanted them to stand out a bit more when they were suspended from the centerpieces we had created.

I chose an off-white spray paint since the table
linens are off-white.  Once again, my husband
came through and took care of this step for me.

The final touches used to complete the project were all purchased at Hobby Lobby:
  • gold peel and stick numbers
  • gold glitter glue 
  • fine gold cord
 ....and that's all there is to it!