Search This Blog

Pages

Tuesday, December 26, 2023

STUFFED MUSHROOMS

 This Christmas Eve dinner called for an appetizer.  And, for some reason the first thing I thought of was stuffed mushrooms.   I've enjoyed them many times, but have never made them before.  So this holiday seemed as good a time as any.  

This is the only picture I was able to get before these babies were devoured.  So, it seems only reasonable to share this yummy recipe with you!

INGREDIENTS:

24 oz. white button mushrooms (I selected 10 fairly uniform medium large)
1/3 lb. hot Italian sausage* 
1/2 medium onion, finely diced
4 cloves garlic, finely minced
8 oz. cream cheese*
1 egg yolk
3/4 cups grated parmesan cheese
1/3 cup booking broth or white cooking wine*
salt and pepper to taste


DIRECTIONS:

Heat oven to 350 degrees.   Clean mushrooms.  Wipe off with a damp paper towel or rag.  Pop out mushroom stems, reserving both the caps and stems.  I spooned out the interior of the mushroom really well not only to clean them, but to create a large cavity for the filling. 

1.  Chop mushroom stems finely and set aside
2.  In a medium skillet, brown and crumble the sausage.  Drain and set aside on a plate.
3.  Add onions and garlic to the same skillet; cook for 2 minutes over medium heat.  Pour in wine or broth to deglaze the pan; allow the liquid to evaporate.  Add in the chopped mushroom stems, stir to cook for 2 minutes.  Add salt and pepper to taste.  Set mixture aside on a plate to cool.
4.  In a mixing bowl, combine cream cheese and egg yolk.  Stir together with cheese.  Add cooked sausage/mushroom mixtures.  Stir together and refrigerate for a short time to firm up.
5.  Smear mushroom filling firmly into the cavity of each mushroom, creating a sizable mound over the top.  Place on a rimmed baking sheet.
6.  Bake at 350 degrees for 20-25 minutes, or until golden brown.  Allow to cool at least 10 minutes before serving.  Garnish with minced parsley (optional).

NOTES:
* I chose to use pork sausage instead of Italian sausage.  I also went with the 1/3 fat cream cheese which I felt for a recipe like this saves a few calories, but doesn't impact the flavor.  I also used a combo of chicken stock and white cooking wine because I had some leftover stock in the fridge and I thought it would add some additional flavor. 

I would definitely make these again!  They were delicious.  

Enjoy!

Recipe c/o:  www.soufflebombay.com


Thursday, November 30, 2023

GREECE

 Each year I put together a Shutterfly calendar for the upcoming year.  I include pictures from our annual Mother/Daughter trip.  I like looking back on the previous year's trip evert time I turn the page to a new month.    I just realized having just finished my 2024 calendar, that I never posted about this year's trip.  So, here's the long overdue post.....


As I was doing my research on Greece, I realized the country really has a lot to offer.  But as with all my trips, I was really going to have to decide how to get a "feel" for the country by picking and choosing my destinations wisely.  I mean, it could take months to truly explore the country inside and out!

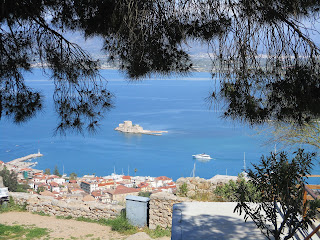
So, I finally landed on Nafplio, Delphi, Meteora, and Athens.  In order to take this all in, I was going to need a rental car until we reached Athens, then I could travel by foot and/or the metro.  I had reserved my rental car in advance, so as soon as we cleared customs, we picked up our car and began our 2 hour drive to the coastal town of Nafplio in the Peloponnese region of Greece.  We stayed two nights in this  quaint little town (the first Capital of Greece), right on the water.  We stayed at a lovely B&B, with the most amazing host, who cooked the tastiest breakfasts.  We trekked the 999 steps to the top of the hill to visit the Palamadi castle, and explored all the nooks and crannies of this city.   It didn't take us long to try some souvlaki, and of course gelato.   The second day we took a road trip to Epidaurus which was about one hour east.                                                    

 Our next destination was Delphi.  It was a four hour mountainous drive, through fog and some serious rain.  We chose to stop by the Corinth canal, which was an amazing site to see.  We dropped our bags at the hotel and quickly headed to the archaeological site of Delphi.  It was absolutely amazing, and the museum is well worth the admission fee.   Delphi is said to be founded by Zeus and is considered to be the "navel of the world".  The site dates back to the 14th century.  Delphi was a quick overnight for us, with Meteora being our next destination. We left right after breakfast since we had another 138 miles to drive.  I knew when I read about Meteora, that I absolutely had to see it!  The monasteries that sit atop these immense rock pillars were incredible to see.  

At one time there were 24, today there are 6.  It truly was a spiritual and amazing place to see.    We arrived about 1130a and promptly headed up the hill to check out three that first day.  Our hotel was right at the base of the cliffs and had a lovely patio that we sat at that first afternoon enjoying a glass of wine and the beautiful views.  The second day we took in another two of the monasteries before heading to Athens.  After our four hour drive to Athens, we dropped the car, caught the metro and met our host at the VRBO we were staying at for the next five days. 


Our VRBO was a two bedroom apartment right across from Monistiraki square.  We arrived about 430p on a Sunday afternoon and it was an absolute madhouse!  So many people, so much noise, including bongo drums.  We were in culture shock having spent the first part of our trip in the most serene and quaint locations.    We promptly walked across the street and enjoyed our first gyro of the trip!  There is so much to see in Athens.  I had booked a guided tour of the Acropolis, which I would recommend.  Just know that most of them are in the morning, so it's pretty busy.  If you'd rather explore on your own, it's less busy in the afternoon.   The museum is unbelievable as well.  We walked and walked and walked exploring the city.  I had also planned a day trip to Hydra island.  I wanted a taste of the island life while I was in Greece.  It was fun.  Just a 2 hour ferry ride.  We spent the day exploring this non-motorized island and had a wonderful lunch right on the harbor.  


And that's a wrap on another epic Mother/Daughter adventure!   We packed a lot in during the nine days we were on the ground in Greece and if you were to ask me if I would change anything, I would honestly say no.  Oh, actually just one thing.  Don't pay for a GPS for the rental car, it just doesn't work.  Use google maps instead.  

The 2024 trip has been planned and booked for quite some time.  It's another European trip that starts at the end of April, which will be here before you know it!

Monday, September 25, 2023

SHRIMP ALFREDO CASSEROLE

 With family in town, I was looking for a recipe that could feed five people, that was super easy to put together, went with this beautiful fall weather that we're having and was on the "comfort food" end of the spectrum.  

I began looking for pasta recipes of course.....The recipe I put together for baked ziti years ago has always been a favorite, but I wondered if there was something just as easy on the alfredo side.  I found exactly what I was looking for and it was so yummy I just had to share!

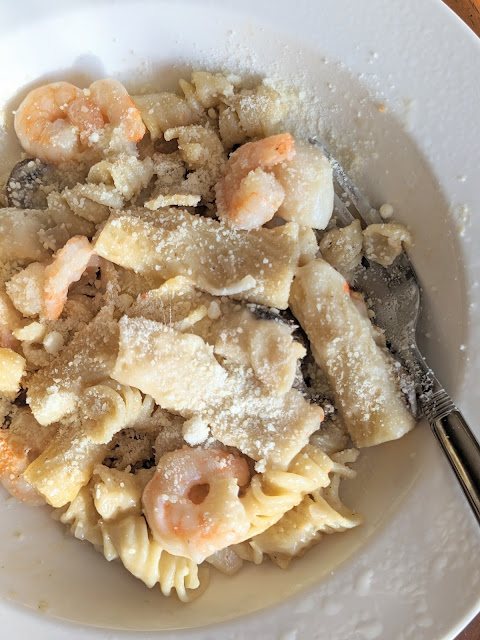
One of the best surprises about this recipe is you don't even have to pre-cook the pasta, so the assembly is super simple.  I'll be honest, I was a little skeptical, but it was great. 
fresh from the oven

INGREDIENTS:

1 16 oz. package uncooked rotini pasta      
1 22 oz. jar Alfredo sauce (about 2 ½ cups)
2 cups low sodium chicken broth
1 cup white wine
½ cup diced onion
2 tsp. minced fresh garlic
1 (4 oz.) jar diced roasted red peppers (pimentos), drained (about ½ cup)
1 cup shredded mozzarella cheese or Italian cheese blend
2 lbs. raw peeled and deveined shrimp (41=50 count)
Optional garnishes:  grated parmesan,  fresh chopped parsley, basil, or other hers

DIRECTIONS:

Pre-heat oven to 425 degrees.  In a large 13x9 baking dish, stir together uncooked pasta, Alfredo sauce, chicken broth, wine, onion, garlic and red peppers.  Cover tightly with aluminum foil and bake for 45 minutes. 

Remove dish from the oven and give it a stir.  At this point, check to ensure the pasta is al dente.  If it's still too hard, cover the dish and return to the oven until pasta is al dente.   (I needed an extra 5 minutes)

Once the pasta is just right, and the sauce is thickened, stir in the uncooked shrimp.  Sprinkle mozzarella over the top.  Bake uncovered for 5-10 minutes.

The dish is finished when the cheese is melted and the shrimp is pink.  Keep a close eye on the shrimp...you don't want to overcook the shrimp and have it turn rubbery.  Garnish to your liking.  

Total cooking time will vary depending on the type of pan you use and your individual oven.  Ceramic and glass pans take longer than metal.  

Note:  I couldn't find raw peeled and deveined shrimp in this size.  I opted for 1 lb. cooked shrimp and 1 lb. of uncooked scallops....the cook time worked fine to cook the scallops and it didn't overcook the shrimp.  You might also notice mushrooms in mine.....I opted to sauté some fresh mushrooms and added them at the same time I added the seafood. 


Enjoy!

recipe c/o:  www.theseasonedmom.com

Friday, September 15, 2023

GINGERSNAP COOKIES

 With some out-of-time family coming to town I always plan out meals, snacks, goodies.  So when I was thinking of goodies, homemade cookies came to mind.  I decided to bake a variety I haven't made in quite some time.....and that's gingersnap cookies.  I have to say, they tasted especially good having not had them for so long.  

With the feel of fall in the air, gingersnaps were so perfect.  Crisp on the outside and chewy on the inside.  

INGREDIENTS:

3/4 cup vegetable oil                                                                       
1 cup granulated sugar
½ tsp salt
2 tsp. baking soda
1 large egg
1/3 cup molasses
2 1/3 cups all purpose flour
1-2 tsp. ginger
½ tsp. cloves
1 tsp. cinnamon

Coating:
¼ cup granulated sugar
1 tsp. cinnamon


DIRECTIONS: 

1. Preheat the oven to 375 degrees.  Lightly spray (or line with parchment two baking sheets)
2.  Beat together the oil, sugar, salt and soda
3.  Beat in the egg, then the molasses
4.  Add the flour and spices, beating to make a smooth and fairly stiff dough
5.  Make the coating by combining the sugar and cinnamon and place in a shallow dish
6.  Form 1" balls and roll into the cinnamon/sugar mixture
7.  Transfer to the prepared cookie sheets, leaving at least 1 ½" between them
8.  Bake the cookies for 8-11 minutes for cookies that are crisp around the edges; and "bendy" in the center  (mine were perfect at 9 minutes)
9.  Remove the cookies from the oven and cool right on the pan, or wire rack.  Cool completely, then store tightly wrapped at room temperature.

Enjoy!

recipe c/o: www.kingarthurbaking.com


Friday, June 23, 2023

DESSERT NACHOS

 I landed on this recipe after looking for a simple dessert that also wouldn't be too heavy after an Italian meal.   There's a bit of prep work involved, but it can all be done ahead of time and assembled quickly when you're ready.  

And it was just as I hoped....easy and perfect after a filling meal.  Because it took me a couple attempts to get the tortillas browned just right, I also had some leftovers for the next day!

INGREDIENTS:

5 flour tortillas (I used the 8" size)      

3 Tbsp. melted butter
10 tsp. granulated sugar
1 tsp. cinnamon
4 large strawberries, sliced
1 banana, sliced
1/2 cup blackberries
1/2 cup raspberries
2-3 tsp. chocolate sauce
1 c. whipped cream (optional)


DIRECTIONS:

Pre-heat the oven to 400 degrees.  Mix together the sugar and cinnamon.  Melt the butter and use a pastry brush to coat an unbaked tortilla thoroughly.  Sprinkle the cinnamon and sugar mixture over the tortilla and repeat for the remainder.  

Use a pizza wheel to slice the tortillas into triangles.  First in half, then in thirds.  Place the triangles onto a baking sheet lined with parchment paper.  Bake for 6-8 minutes until puffed and golden.

Slice the fruit while the chips bake.  Arrange the tortilla chips onto a platter.  Top with sliced fruit.  Drizzle warm hot chocolate sauce over the fruit and top with whipped cream.  Serve immediately.

Note:  You can prep up to 2 days ahead of time, by baking the chips and putting them in an airtight container. 

Enjoy!  


Monday, May 1, 2023

CREAMY LEMON CHICKEN WITH SPINACH AND ARTICHOKES

Since this recipe was said to have the same flavors as that fabulous spinach artichoke dip we all love, I thought I'd give it a try!    And....it did have a lovely flavor.  The recipe calls for it to be served over rice, although I think I might perfer angel hair pasta next time.  


INGREDIENTS:

2 chicken breasts or 4 thighs
flour, salt and pepper
2 Tbsp. unsalted butter
2 Tbsp. olive oil
1 Tbsp. minced garlic
1 Tbsp. fresh thyme
1 ¼ cups low-sodium chicken broth
4 oz. cream cheese, softened**
10 oz. baby spinach (7 cup)
3 Tbsp. fresh lemon juice
1 oz. Parmigiano Reggiano, finely grated (1/2 cup packed)
1 pkg. (9 oz.) frozen artichoke hearts, thawed, quartered  if whole (I used the canned variety w/o the juices) 

DIRECTIONS:

Season chicken with salt & pepper; dredge in flour, shaking off any excess. Add butter and 1 Tbsp. olive oil to a heated skillet.  When butter melts, add chicken in a single layer and cook, flipping once, until golden brown in places, but not cooked through, about 3 minutes.  Transfer to a plate.

Add remaining 1 Tbsp. oil, garlic, and thyme to skillet; cook until fragrant, 10 seconds.  Stir in broth and cream cheese; cook until mixture boils and cheese melts.  Add spinach and cook, stirring, until wilted; 2-3 minutes.  Stir in artichokes; cook 1 minute more.  

Return chicken and accumulated juices to skillet.  Simmer, shaking pan occasionally, until sauce is reduced and thickened and chicken is just cooked through.  About 3 minutes.  Remove from heat; stir in lemon juice and parmesan.  Serve over rice. 


NOTES:  ** This is the first time I've used cream cheese in a sauce, and I ended up with little shards of cream cheese floating in the sauce.  It did not melt per the instructions.  I've since done some research and it seems there is a technique to this, so it was probably me.  If I make this again, I've decided to avoid this I'm going to use sour cream instead, I know how well it works in a sauce and it actually has much fewer calories than cream cheese as well. 

Wednesday, April 26, 2023

RE-STYLED WEDDING GOWN

 I had the pleasure of working on another project that involved taking my Bride's Mother's wedding gown and re-styling it so that she could wear it.  Originally she planned on wearing it on her big day, but after finding a gown at a bridal shop that just spoke to her, she decided she would like me to re-style Mom's gown for her rehearsal dinner.         


This is Mom's circa 1980's wedding gown.  Having gotten married in this same era myself, I knew when she told me the year her folks were married that I'd be getting a very large gown....large sleeves, large (and long) train and a large full skirt.  

Marissa was open to ideas from me on how we could re-style the gown.  The good news was the gown was in great shape!  Very little yellowing (a bit on some of the sequins and pearls) and no stains.  Based upon the classic heavy beading of that era, I felt we definitely needed to utilize the bodice.  I knew that I could remove the neckline and sleeves and make it into a strapless bodice.  As for the skirt, we landed on a hi-low circle shape skirt.  Once I knew the design, I was off to the races. 

The majority of my workload was in the disassemby of the gown.     I chose to start with the bodice. I removed the sleeves and the netting for the front and back bodice.  

        
  I had it easy from a fit perspective since Marissa and her Mom were virtually the same size.  Other than adding some additional structure to the bodice due to the fact that it was strapless, the circumference was perfect!       I chose to change the shape of the waistline by eliminating the deep point at the center front.                                                                   The largest amount of workload came when I had to remove the ruffles and appliques from the back train....that literally took hours.  Once that was finished, I created the pattern for the shape of my skirt and then laid that on top of the existing gown to cut the new skirt.   As you can see, the skirt has the same layers as her Mom's....satin underlayer, chiffon overlay.   There was a gorgeous lace on the train that truly was lost in all the ruffles.  I showed Marissa that I wanted to use that at the hemline once I removed the ruffling and laid it flat you couldn't even recognize it.                                              
  

I have to say there was work in the bodice.  Obviously, I had to re-set the zipper.  I also added boning, cups and silicone tape since Marissa was going to need that structure for it to effectively stay put.  I also sewed on the beautiful satin buttons down the length of the zipper.  

The final steps were to handsewn on some of the lovely appliques which were scattered over her Mom's skirt.  Just a touch.  I'm hoping to get some pictures from the rehearsal dinner night, which was last weekend, but in the meantime, since this project was a 2022 project, I was excited to share.